With the cross stitch worked for this last Easter, this lovely little piece has languished long enough . . . I thought it was time to do something with it.
But what?
Well, this Easter I decided to make a larger version of the fabric basket I made back in about 2009 . . .
This one stands about 9" tall and about 8" wide, so should make a good little project bag! I absolutely love the French Blue linen and the custard coloured stitching - a colour combination I've wanted to work with for a while now.
And what's more, I'm really pleased to have finally put this little cross stitch to good use. Not much point just having it sit in a box any longer . . .
I find there's something quite satisfying about making something with purpose. And this is one bag that I'm sure will serve it's purpose well!
Cross Stitch Pattern: Rabbit & Chicks
Designer: Luli
Publication: http://ioluli.blogspot.com.au/
Fabric Basket Pattern: Inspired by Pink Penguin's Fabric Basket Tutorial
Publication: http://ayumills.blogspot.com.au/2008/05/tutorial-fabric-basket.html
Fabric: 32 count Belfast Linen, French Blue
Thread: DMC 676, 2 strands
Showing posts with label bags/baskets. Show all posts
Friday, 5 April 2013
Tuesday, 8 May 2012
How Do You Store Your Hoops?
I got myself a new embroidery hoop a little while ago . . . it's a Morgan Multi-Purpose Lap Stand, which seems to work really well for me. It frees up my hands for the actual business of stitching. The ribbed inner hoop helps to keep the fabric nice and taut when required. And it's pretty versatile with the 2 sizes of hoop.
But how should I store it when I'm not using it? Hmmm? I mean, there are 2 hoops and the 3 posts. So what's the best solution?
In a bag, of course!
But, of all the bags I've gathered over time, none of them were quite right.
So naturally one had to be made!
I decided on a satchel style and I'm quite pleased with the results . . . I love the fabric, and I also got to use a couple of vintage buttons that I've had sitting waiting for just the right thing.
Now I've got a cute storage solution, as well as a handy tote if I need to take the hoops out with me. All in all, this little hoop bag suits my requirements perfectly.
What's the best way you've found to store your hoops?
Fabric: Etchings by 3 Sisters for Moda
But how should I store it when I'm not using it? Hmmm? I mean, there are 2 hoops and the 3 posts. So what's the best solution?
In a bag, of course!
But, of all the bags I've gathered over time, none of them were quite right.
So naturally one had to be made!
I decided on a satchel style and I'm quite pleased with the results . . . I love the fabric, and I also got to use a couple of vintage buttons that I've had sitting waiting for just the right thing.
Now I've got a cute storage solution, as well as a handy tote if I need to take the hoops out with me. All in all, this little hoop bag suits my requirements perfectly.
What's the best way you've found to store your hoops?
Fabric: Etchings by 3 Sisters for Moda
Labels:
bags/baskets,
Embroidery,
Hoop
Thursday, 15 March 2012
How do you gift wrap bottles?
My son has given various bottles as gifts now . . . and as the king of innovative gift wrapping he wanted something more than a paper gift bag. I should have taken pictures of the cool woven ribbon wrapping he did at Christmas, but I did get this one of the over-sized "gift" box he created . . .
So I was drafted in as the maker of fabric bottle bags.
The bags are really simple and quick to make. They only take a piece of fabric about 17" x 12" (plus a bit extra to make the tie if you don't want to use ribbon).
A side seam.
A bottom seam (plus bag corners if you want it to fit nicely at the bottom).
And a hem around the top. You can't go too far wrong . . .
Putting my high school needlework lessons to good use, I stitched french seams, so it's nice and neat inside - no lining required. It's been a great opportunity to use fabric that I've had for a while, just waiting for the right project. So everyone wins - a happy son, a happy gift recipient, and a bit of stash-busting for me!
Fabric: Pointillist Palette by Debra Lunn & Michael Mrowka for Robert Kaufman Co., Inc
So I was drafted in as the maker of fabric bottle bags.
The bags are really simple and quick to make. They only take a piece of fabric about 17" x 12" (plus a bit extra to make the tie if you don't want to use ribbon).
A side seam.
A bottom seam (plus bag corners if you want it to fit nicely at the bottom).
And a hem around the top. You can't go too far wrong . . .
Putting my high school needlework lessons to good use, I stitched french seams, so it's nice and neat inside - no lining required. It's been a great opportunity to use fabric that I've had for a while, just waiting for the right project. So everyone wins - a happy son, a happy gift recipient, and a bit of stash-busting for me!
Fabric: Pointillist Palette by Debra Lunn & Michael Mrowka for Robert Kaufman Co., Inc
Labels:
bags/baskets,
Bottle Bag,
Quick project
Saturday, 4 June 2011
Scandinavian Stitching
I had been seeing the book "Scandinavian Needlecraft" all over the internet and then I came across this pattern here.
I couldn't resist.
I had to make it.
I made it the size on the template (not the enlarged version), so it's quite small - only 5 1/2" from the base to the top of the handle.
How cute is this bag?
Wait, what's that I see? Oh yes, I do believe it's more felt on my horizon!
Pattern: scandinavian-style felt bag with embroidered bird
Designer: Clare Youngs
Publication: Scandinavian Needlecraft: 35 Step-by-step Projects to Create the Scandinavian Home
I couldn't resist.
I had to make it.
I made it the size on the template (not the enlarged version), so it's quite small - only 5 1/2" from the base to the top of the handle.
How cute is this bag?
Wait, what's that I see? Oh yes, I do believe it's more felt on my horizon!
Pattern: scandinavian-style felt bag with embroidered bird
Designer: Clare Youngs
Publication: Scandinavian Needlecraft: 35 Step-by-step Projects to Create the Scandinavian Home
Labels:
bags/baskets,
Felt,
Scandinavian,
Stitching
Tuesday, 3 May 2011
Crown Bag
Inspired by our night of royal-ness and wedding-watching, I decided to make a crown bag. Not that I have a crown to go in it or anything, but you never know!!
This is a really simple bag to make up. I've made it in several sizes now, from about 4 inches square up to about 10 inches square. The little ones are cute, but for usability, I think 7 inches is good.
So, I start with 5 squares of the same size . . . 7" x 7" for the outer, and the same for the lining.

I drew up a crown and used vliesafix to attach the crowns, ready for raw-edge applique.

I really like the sketchy look of straight stitch, raw-edge applique. When I am doodling or sketching I invariably find myself drawing over the same lines more than once, so the look of this stitching style suits me . . .

Once all the embellishment to the side squares is done, I join one side at a time to each side of the bottom square. Then stitch the side seams from the top edge to the bottom corner. I do the same for the lining, leaving an opening on one of the side seams for turning through.
I make 2 loops, 1 each (about 3" long) for opposite sides and a long strip (about 20" long) for the handle, which is attached at the other pair of opposite sides . . . so all 4 sides have something attached to them. On the smaller bags I've found using ribbon for the loops is really good. I pin the loops and handle right side out, facing down, to the outer bag squares and pin or tack them in place. Then I put the bag outer inside the lining, right sides together and stitch around the top edge, making sure to catch the loops and handles in the seam.
Turn the bag right side out through the opening in the lining side seam. Hand stitch the opening closed and voilà . . .

one cute and useful little bag - in all its "crowning glory". Slip the handle through each of the side loops, pull it up to close the bag and you're good to go!

If crowns aren't your thing, these bags are a nice way to try a new block or use some of your "just had to have it" fabric. The options are limitless!

Pattern: Crown Applique
Designer: Sue Hampson
This is a really simple bag to make up. I've made it in several sizes now, from about 4 inches square up to about 10 inches square. The little ones are cute, but for usability, I think 7 inches is good.
So, I start with 5 squares of the same size . . . 7" x 7" for the outer, and the same for the lining.

I drew up a crown and used vliesafix to attach the crowns, ready for raw-edge applique.

I really like the sketchy look of straight stitch, raw-edge applique. When I am doodling or sketching I invariably find myself drawing over the same lines more than once, so the look of this stitching style suits me . . .

Once all the embellishment to the side squares is done, I join one side at a time to each side of the bottom square. Then stitch the side seams from the top edge to the bottom corner. I do the same for the lining, leaving an opening on one of the side seams for turning through.
I make 2 loops, 1 each (about 3" long) for opposite sides and a long strip (about 20" long) for the handle, which is attached at the other pair of opposite sides . . . so all 4 sides have something attached to them. On the smaller bags I've found using ribbon for the loops is really good. I pin the loops and handle right side out, facing down, to the outer bag squares and pin or tack them in place. Then I put the bag outer inside the lining, right sides together and stitch around the top edge, making sure to catch the loops and handles in the seam.
Turn the bag right side out through the opening in the lining side seam. Hand stitch the opening closed and voilà . . .

one cute and useful little bag - in all its "crowning glory". Slip the handle through each of the side loops, pull it up to close the bag and you're good to go!

If crowns aren't your thing, these bags are a nice way to try a new block or use some of your "just had to have it" fabric. The options are limitless!

Pattern: Crown Applique
Designer: Sue Hampson
Labels:
Applique,
bags/baskets,
Raw-edge applique
Saturday, 30 October 2010
Stitchery and Bags
I started out to make a bag so that I could applique this little stitchery on to it. The stitchery is from a retreat with Rosalie Quinlan and Leanne Beasley held in Nowra (hosted by Jukejema Quilting Barn) and was a practice in satin stitch.

So I had the fabric for the bag, chosen to match the variegated threads (Cosmo Seasons) used in the stitchery.
But then procrastination set it!
And stayed for a while!
And then a while longer!
To cut a long period of procrastination short, I ended up using the applique on the front of a journal cover. There's something quite decadent about a notebook covered in fabric, don't you think?

So this journal cover did not use any of the original fabrics (although it did use fabrics from my stash, so that counts for something). I'm loving these muddied/muted colours at the moment.
Well, then there was still the issue of the fabric for a bag!
So I stitched the bag outer.
And the bag lining.
And then I decided that I really, really liked the bag lining and that it should be a bag of its own.
And it is!

I've put a casing and drawstring on it, so I can fill it up or give it a little shape if it's not so full. I really love the fabrics in this bag.


But then, what to do with the original bag outer?
Well, make another lining, of course.

So this one also used fabric from my stash (it feels good to use from the stash).
I left the lining sitting up a little at the top to give the look of piping, and then top stitched to keep it in place. I quite like the look of this one.

Both bags have been put into service and it's lovely using fabric instead of plastic when I'm out and about!
What project of yours has evolved into something entirely different?
So I had the fabric for the bag, chosen to match the variegated threads (Cosmo Seasons) used in the stitchery.
But then procrastination set it!
And stayed for a while!
And then a while longer!
To cut a long period of procrastination short, I ended up using the applique on the front of a journal cover. There's something quite decadent about a notebook covered in fabric, don't you think?
So this journal cover did not use any of the original fabrics (although it did use fabrics from my stash, so that counts for something). I'm loving these muddied/muted colours at the moment.
Well, then there was still the issue of the fabric for a bag!
So I stitched the bag outer.
And the bag lining.
And then I decided that I really, really liked the bag lining and that it should be a bag of its own.
And it is!
I've put a casing and drawstring on it, so I can fill it up or give it a little shape if it's not so full. I really love the fabrics in this bag.
But then, what to do with the original bag outer?
Well, make another lining, of course.
So this one also used fabric from my stash (it feels good to use from the stash).
I left the lining sitting up a little at the top to give the look of piping, and then top stitched to keep it in place. I quite like the look of this one.
Both bags have been put into service and it's lovely using fabric instead of plastic when I'm out and about!
What project of yours has evolved into something entirely different?
Labels:
bags/baskets,
Craft,
Patchwork amp; Quilting,
Satin Stitch,
Stitchery,
Stitching
Wednesday, 12 May 2010
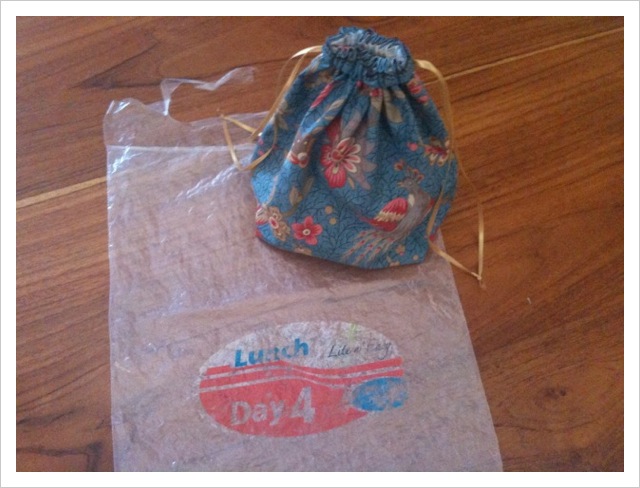
My New Lunch Bag . . .
Or breakfast bag, really.
I've been taking my brekkie to work in this same poor old plastic bag for quite a while now, and it's well and truly served its purpose and is a bit past its prime, so I thought it was time for a change . . .

So my new model is just little and light - no lining or padding - I just wanted something very simple to throw in my bag. It usually holds a small container each of muesli and yoghurt, so it didn't need to be too big.

I really love the Rural Jardin range of fabrics and this little piece was just right for my bag! Breakfast doesn't need to be boring, you know . . .
I've been taking my brekkie to work in this same poor old plastic bag for quite a while now, and it's well and truly served its purpose and is a bit past its prime, so I thought it was time for a change . . .
So my new model is just little and light - no lining or padding - I just wanted something very simple to throw in my bag. It usually holds a small container each of muesli and yoghurt, so it didn't need to be too big.
I really love the Rural Jardin range of fabrics and this little piece was just right for my bag! Breakfast doesn't need to be boring, you know . . .
Labels:
bags/baskets,
Craft,
Home / Life,
Patchwork amp; Quilting
Thursday, 18 March 2010
Project Bag
I had this bag, designed to manage fat quarters, I think - but seriously, is it big enough for that??? It worked well as a project bag, but didn't look all that thrilling to me.

I had a Bronywn Hayes stitchery which looked lovely, but didn't really have a home.

So what's a girl to do?
This is what you get when you combine the two . . .

I covered a thin piece of board and stitched it into the top (clear) lid of the bag. Now I have a safe home for the stitchery and a great project bag!
How do you use stitcheries in your world?
I had a Bronywn Hayes stitchery which looked lovely, but didn't really have a home.
So what's a girl to do?
This is what you get when you combine the two . . .
I covered a thin piece of board and stitched it into the top (clear) lid of the bag. Now I have a safe home for the stitchery and a great project bag!
How do you use stitcheries in your world?
Labels:
bags/baskets,
Craft,
Patchwork amp; Quilting,
Stitchery,
Stitching
Friday, 12 March 2010
Fabric Basket
I found this great tutorial by Pink Penguin on the net for a little fabric basket a while back and thought how cute it was. So . . .

I went ahead and made the little fabric basket . . . which of course would not be complete without a matching pin cushion and needle case and thread catcher! (This thread catcher is made differently to my others - this one is just like a tiny little bag.)

I opted for one piece of fabric for the outside bottom section (rather than pieced) and I added pockets to the inside of mine, which I find quite handy. I toyed with the idea of having handles (like a bag) but in the end went with the original design (basket/side style). And actually they work pretty well for me - after all, it 's a bit of a hold-all, not a carry bag. This basket often has the "project of the moment" bits and pieces in it, like embroidery threads etc. It's just the right size - not too little, not too big.

I had this braid, which I just loved the moment I felt it - so soft and lovely - just waiting for the right project.
All in all, this is one little basket that I find myself using A LOT. And it's such a cute and quick project to do. It would be great for all sorts of things - a gift bag with sewing stuff inside . . or pretty filled with hair ties for a little girl . . . or in luscious fabrics and filled with chocolates . . . the sky's the limit really with this one.
What little project has made your world a little brighter?
I went ahead and made the little fabric basket . . . which of course would not be complete without a matching pin cushion and needle case and thread catcher! (This thread catcher is made differently to my others - this one is just like a tiny little bag.)
I opted for one piece of fabric for the outside bottom section (rather than pieced) and I added pockets to the inside of mine, which I find quite handy. I toyed with the idea of having handles (like a bag) but in the end went with the original design (basket/side style). And actually they work pretty well for me - after all, it 's a bit of a hold-all, not a carry bag. This basket often has the "project of the moment" bits and pieces in it, like embroidery threads etc. It's just the right size - not too little, not too big.
I had this braid, which I just loved the moment I felt it - so soft and lovely - just waiting for the right project.
All in all, this is one little basket that I find myself using A LOT. And it's such a cute and quick project to do. It would be great for all sorts of things - a gift bag with sewing stuff inside . . or pretty filled with hair ties for a little girl . . . or in luscious fabrics and filled with chocolates . . . the sky's the limit really with this one.
What little project has made your world a little brighter?
Labels:
bags/baskets,
Craft,
Patchwork amp; Quilting,
Thread Catchers
Subscribe to:
Posts (Atom)